How to setup a cloud server for Deep Learning and Cloud Gaming
In this tutorial, I will explain how to set up a fully working Windows cloud server in Google Cloud Platform. You can use this cloud server for artificial intelligence model training purposes or play your AAA games with it since it has a very powerful GPU and a huge amount of RAM.
Before we start, what you need
- Credit / debit card
- Gmail Account
- Government Issued ID (e.g. IC, driving license..)
I will divide this tutorial into four parts: Register for GCP, Firewall and Quotas, Deployment of server and Setup for gaming.
(1) Register for a trial account from Google Cloud Platform
Google offers a 300$ trial credit and 3 12 months (updated Aug 2021) validity for every first-time user when
they sign up.
First, we need to go to GCP (Google Cloud Platform) to register our account. Click
the Get started for free button and login into your Gmail account. Then, fill in your
details as per requested on the website.
Google will need your credit/debit card information to bill you once the trial credit is exhausted. I recommended using a low-balance debit card to avoid unnecessary problems. Please note that Google will only start charging your card when you enable billing, which by default is disabled.
In some instances, verification is needed and this is the part where your ID comes in handy. You will need to submit your ID for verification purposes, and it usually will be done within a few hours.
(2) Firewall and Quotas
Once you have finished your registration, head over to GCP Console. You should be able to see the following page.
 Google Cloud Platform Console.
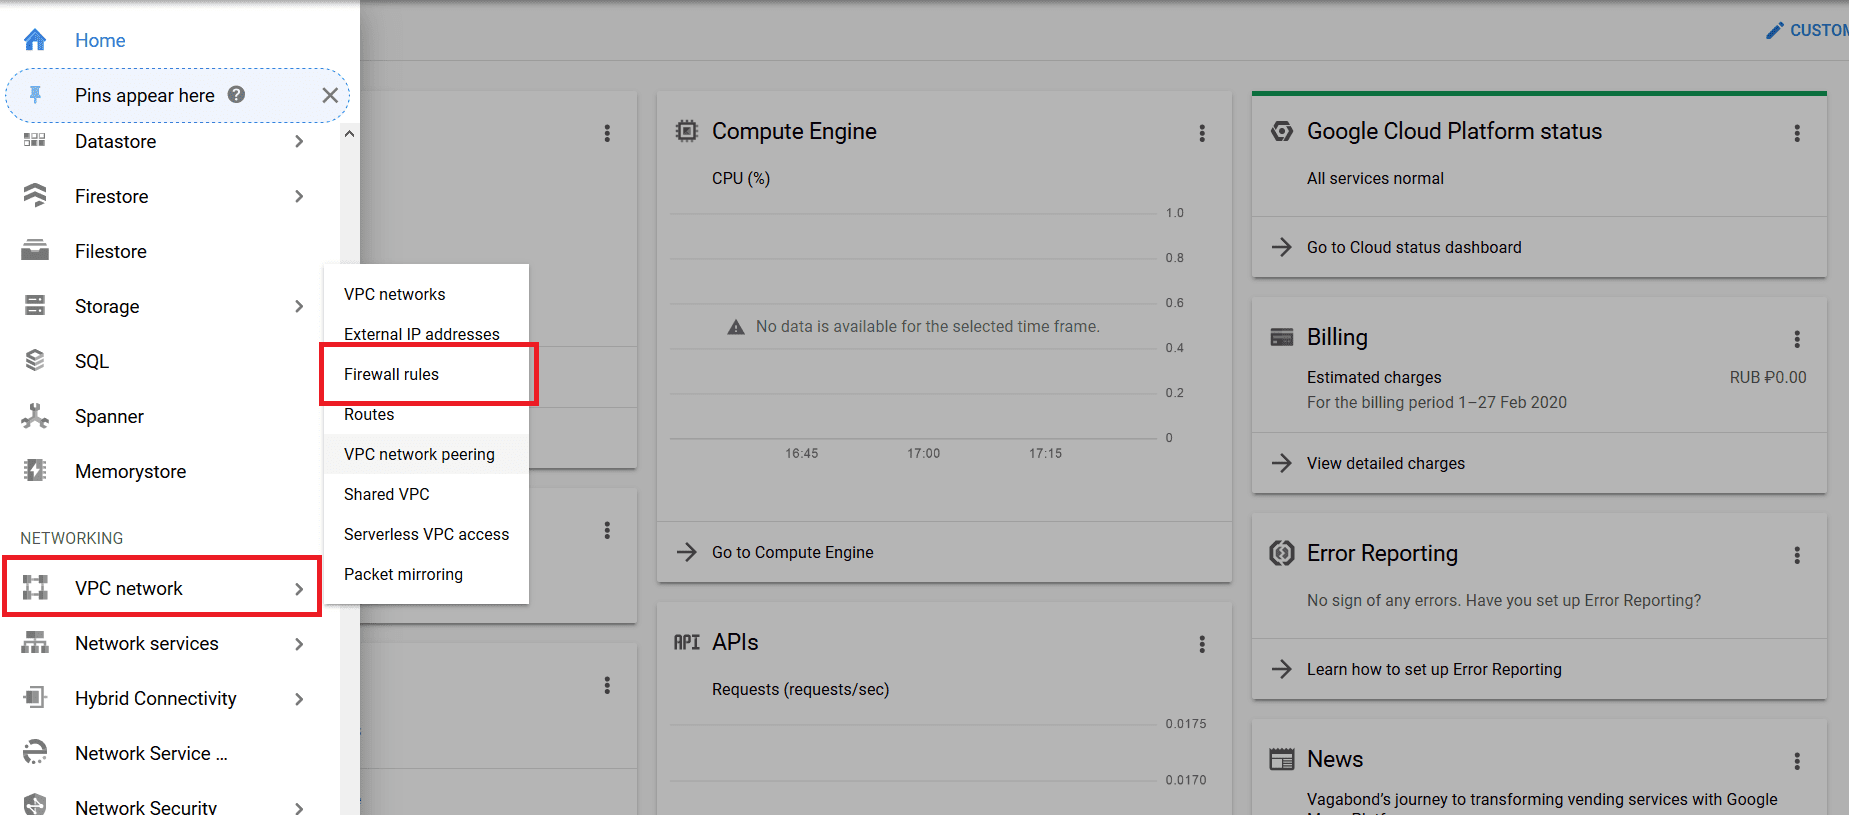
We now need to set up a firewall rule, this will allow us to connect to the instance later on. Firewall rules can be edited at Menu> Networking> VPC network> Firewall rules
Click on Create Firewall Rule and configure the rule as below. Note: The name and description of the rule can be any, as long as it follows the naming rules.
 Target Tags, Source IP ranges, Protocols and ports
After setting up our firewall rule, we need to increase our region's GPU quota. Head over to Menu> IAM & Admin> Quotas
Clear the filter by going to Metric and selecting none. Now search for GPU (All regions) in the textbox and tick it.
You will now be left with an option named Computer Engine API; select it and click on Edit Quotas. Fill in your details and click next to fill in the quota you wish to increase (in this case, is 1) and the reason why you need it.

After submitting a request, you will need to wait for the approval. You will see the increased quota once you get approved.
Do the same thing for the Metric "Committed NVIDIA P4 GPUs". This time, select your preferred location. I pick asia-southeast1 (Singapore) because it is nearer to my physical location.
(3) Deployment of Server
We can now create our instance by going to Menu> Compute Engine> VM instances.
Click on Create Instance and you can now pick the configuration you need.
In my case, I picked the following configurations:
- Singapore
- N1 Series
- 8 vCore + 30GB RAM
- Nvidia Tesla P4 (GRID) - Must GRID else you will get throttled performance
- 150GB Storage with Windows Server 2016 Datacenter (Min 30GB reserved for windows)
Important To add a GPU to your instance, you must enable billing. This will allow Google to charge your card directly after your trial credit is exhausted / expired.
In order to prevent you got charged for a HUGE amount, a debit card is highly recommended.
As renting a server can be VERY EXPENSIVE, I recommend you to shut down the instance when you're not using it. Google charges instance by hourly usage, storage and network for monthly usage.
With 300$ trial credit, you will be able to have a great time before the credits finished. Just be aware of the balance and delete the instance before your credits gone.
After selecting your configurations, you can take a look at the overview of the total cost at the upper rightmost corner.

Don't get shocked by the huge amount, that's the price if you run it 24/7. For our usage, refer to the hourly charge.
Once you have deployed your instance, you can apply the firewall rule that we just created. Click on the instance name, Edit> Network tags, and type in the tag.
(4) Setup for Deep Learning / Cloud Gaming
Now you will be redirected back to the main page, where you can see all of your instance. Click on "Set Windows password" under the column Connect. Set the username and password, you will need it later to connect to the server. Click the RDP button to connect after you're done.
You can download the RDP configuration files or connect it using Chrome.
When you're inside your server, you need to download either of these software and connect through them:
- AnyDesk
- Teamviewer
The reason why we are using a third-party remote desktop application is because Microsoft RDP uses a second display, which will affect our next steps.
We will now download our driver for the GPU that you've selected. You can either find it on NVIDIA Official website or this DIRECT LINK (Link provided by FlickStiq)
Now at this stage, your server should be fully functional. For those who want to work on model training, you can start working on your own already. The following steps are specially designed for those who wish to set up game streaming device using this device.
In order to stream our game smoothly, we will use other third-party game streaming software like Parsec and Rainway. Both are very good in their way, it depends on which type of gaming experience you need.
Parsec requires you to download their own application in order to stream, while Rainway allows you to play it just from your browser (Chrome).
But in this tutorial, I'll be showing Parsec instead.
Download Parsec from the link above, both on your PC and the server. You will need to register an account in order to use it.
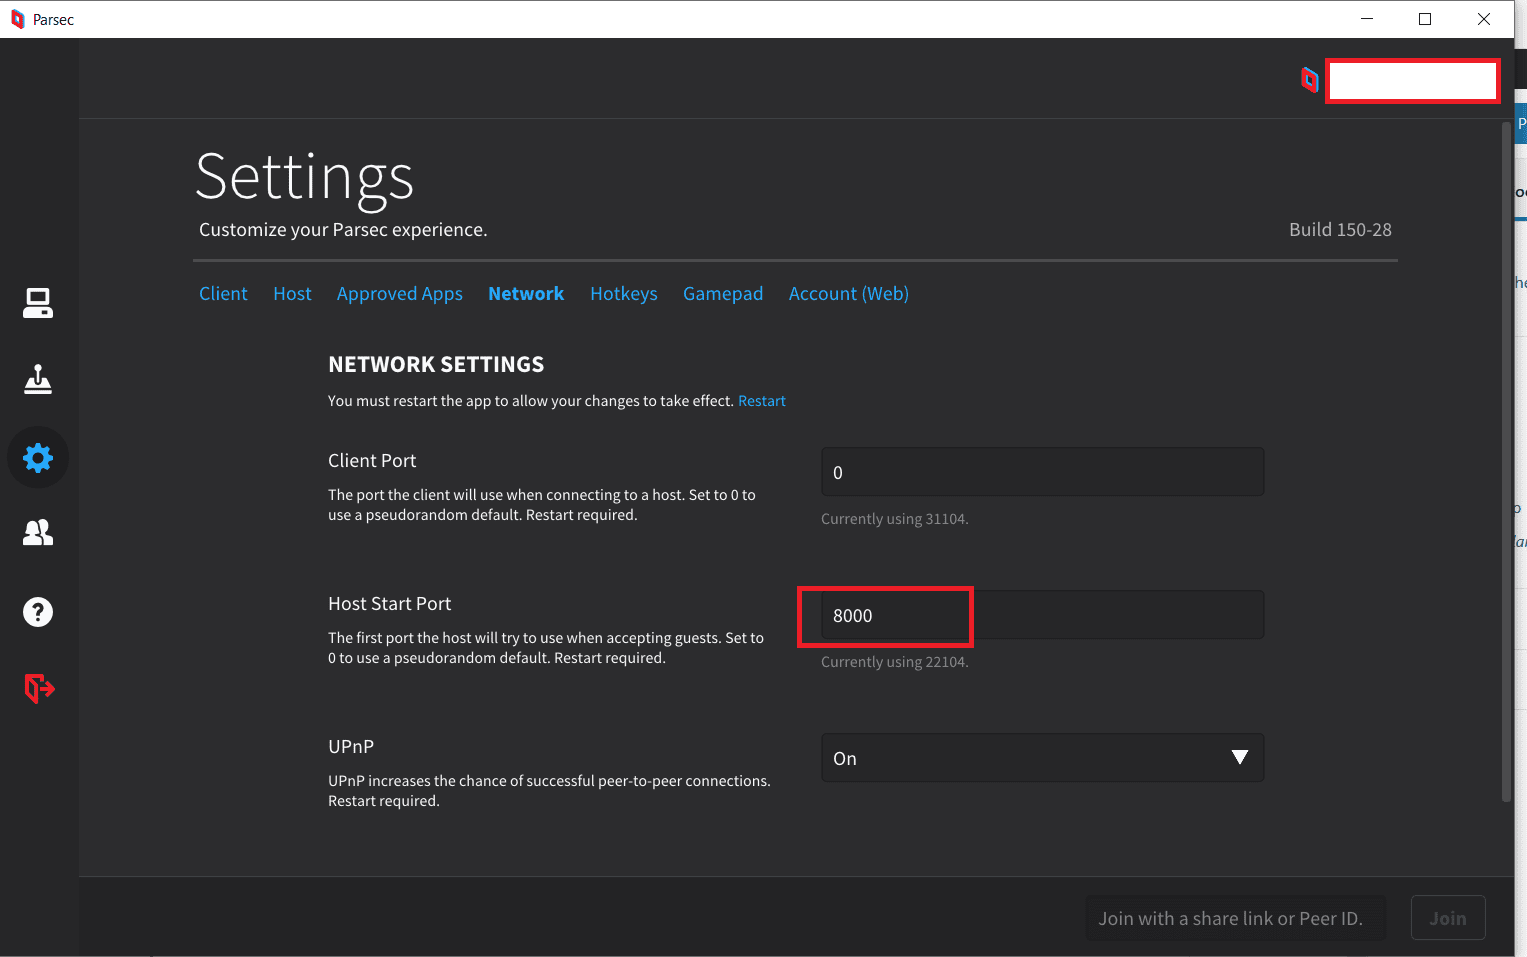
Open up Parsec from your server, navigate to Settings> Network Settings> Host Start Port, change it to 8000 . A restart is required for the new setting to take place. You can also walk around other settings as well. It allows you to configure your preferred configurations easily.
It's finally done! You can disconnect from AnyDesk/Teamviewer and try to connect it via Parsec. You may install your favourite platform such as Steam , Uplay , etc.
Advanced Setting
- Automate login on every startup.
- On start menu, search for netplwiz .
- Uncheck the checkbox "User must enter a username and password…"
- Click on Apply and OK.
- Audio Driver and Services
- Go to Services (start menu), then search for Windows Audio.
- Double click, change the startup type from manual to automatic.
- Start, apply, OK.
- Install VB-Audio Cable
- Remove user permission restriction
- Go to Window PowerShell, enter the following command powershell -ExecutionPolicy Unrestricted
That's it for our post today. Enjoy :)